FREE Tutorial: Make this Easy Scrappy Sawtooth Star Quilt with a Twist!
- Jessica Steele
- Dec 20, 2024
- 4 min read
Updated: Mar 16
Need a quick and easy gift idea? This scrappy sawtooth star quilt came together so quickly and in this blog post, I’m sharing some of the details of how I made it so you can make one too!

The quilt in this tutorial was a gift for my oldest daughter's kindergarten teacher who underwent cancer treatment during the fall. With the help of the kindergarten class we added a traced hand with their own personal touch in the middle of each sawtooth star.
This quick and easy quilt project would be a great gift for any occasion even without the personalization.


Fabric Requirements
For this exact quilt, there were 21 kids in the class so I needed to make 21 sawtooth stars. I started off with a 5 x 5 grid (25 blocks) and left the corners without a sawtooth star, both for less work and to help frame the stars in the quilt design.
The finished size for a 5 x 5 block layout is 60” square. If you wish to add or subtract more blocks, you can use the math below to make adjustments for your version.
Each sawtooth star block finishes at 12 inches and requires:
(1) 6.5 inch white square
(4) 3.5 inch colored squares
(8) 3.5 inch half square triangles (HSTs) of white and various colors
Each 16 patch corner block finishes at 12 inches and requires:
(16) 3.5 inch colored squares
For this specific example, of (21) sawtooth star blocks and (4) 16 patch blocks, I needed the following cuts:

(21) 6.5 inch white squares (for the 21 sawtooth star blocks)
(148) 3.5 inch squares of various colors
(84) → (4) 3.5 inch squares x 21 blocks (for the 21 sawtooth star blocks)
(64) → (16) 3.5 inch squares x 4 blocks (for the 16 patch blocks)
(84) white 4 inch squares (HSTs) (for the 21 sawtooth star blocks)
Using the 2-at-a-time method, 84 white squares will make 168 HSTs.
With 8 HSTs per Sawtooth Star block x 21 blocks = 168 HSTs are required.
(84) 4 inch squares of various colors (HSTs) (for the 21 sawtooth star blocks)
Using the 2-at-a-time method, 84 colored squares will make 168 HSTs. With 8 HSTs per Sawtooth Star block, 168 HSTs are required.
Tips for Adding Art to the Center Squares

In the center of each sawtooth star, I asked for each of the students to trace their hand and color it however they wanted. It’s pretty straightforward however, I do want to share some tips and lessons learned:
Use freezer paper to stabilize the 6.5 inch white fabric squares so it doesn’t shift while the kids are drawing on them with markers
To do this:
cut freezer paper slightly larger than the 6.5 inch white square
Place the 6.5 inch fabric square on the ironing board (right side down if you’re using a print)
Place the freezer paper (shiny side down) on top of the fabric and press with an iron for a few seconds until it is adhered together

Once the drawing is complete and dried, you can carefully peel off the freezer paper
Use fabric markers with a fine tip. We used both Tulip and Crafts 4 All and both worked well.
*Note: do not be tempted to use a permanent marker/Sharpie. I was not in the room when these were being worked on and Sharpie was used to trace the hands and I did see some bleeding after washing just on the outlined areas.
Add markings ¼ inch around the entire square to be sure art doesn’t get cut off by the seam allowance. This is a verbal instruction I gave but I regret not adding a physical marking to help the kids visualize this as some fingertips were lost in the seam allowance.
Making the Half Square Triangles
Once all your pieces are cut, you can begin constructing your blocks!
Start by making your HSTs by using the 2-at-a-time method:
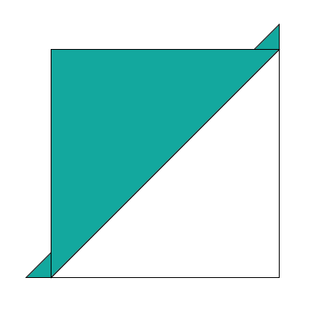
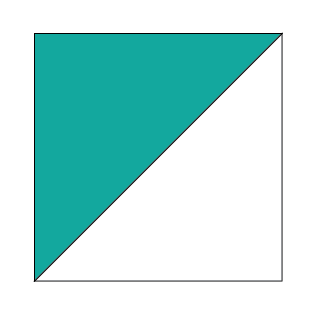
Mark the wrong side of each white 4 inch square with a diagonal line from corner to corner.

Place (1) colored 4 inch square, Right Sides Together (RST), with each white 4 inch square and sew ¼ inch away from the drawn line on both sides.
Cut on the drawn line, press, and trim each HST to 3.5 inches.
When finished you should have (168) 3.5 inch HSTs.
Assembling the Blocks
*Note: if you’re wanting to achieve a gradient like this specific example, it is a good idea to lay your pieces out first and then begin assembling once you have a layout you like.

Sawtooth Star Blocks
Sew each set of HSTs, RST, to make 4 flying geese blocks

Sew 2 flying geese blocks, RST, to the outside of the 6.5” center square

Sew the corner 3.5” squares, RST, to the flying geese in the top and bottom rows.

Sew the top and bottom rows, RST, to the middle row to complete the block.

16 Patch Blocks
Sew each row of 3.5” squares, RST, and press.

*Note: pressing each row in alternating directions as shown by the arrows is helpful for nesting each square for the next step
Sew rows, RST, and press.

Quilt Top Assembly
To assemble the quilt top, simply sew blocks, RST, into rows.

Then sew the rows, RST, to complete the top!

Be sure to add a “victory lap” of stitching about ⅛” from the edge (especially if you’re sending the top to a longarmer!) to keep the piecing on the edges from coming apart.
Congratulations! Your quilt top is finished!
Once your quilt top is finished, quilt and bind as desired. And don't forget to add your quilt label!


I hope you enjoyed this quick tutorial! Be sure to share with me either on Instagram @jessicasteeledesign or email me anytime at hello@jessicasteeledesign.com. I’d love to see your quilt!


What a gorgeous and creative tribute quilt! I'm sure that it will be well-loved in spite of the difficult circumstances. Thank you for such a polished and professional and easy to follow tutorial.