
Hey there, team!
With the release of the Fastball Quilt finally here, I want to make sure you have all you need to get started on your next masterpiece!

The custom label used in this tutorial is included in your purchase of the Fastball Quilt PDF download. In the PDF download, I also walk you through how to customize the label in an exclusive YouTube tutorial. Still need to grab your copy of the Fastball Quilt? Get it here.
Before we get too far, do you prefer a video tutorial? I've got you covered. Check out the video below.
WHAT YOU'LL NEED:
Your custom Fastball Quilt label, customized using the link in your PDF pattern
Thread (I used YLI Hand Quilting thread to add my labels)
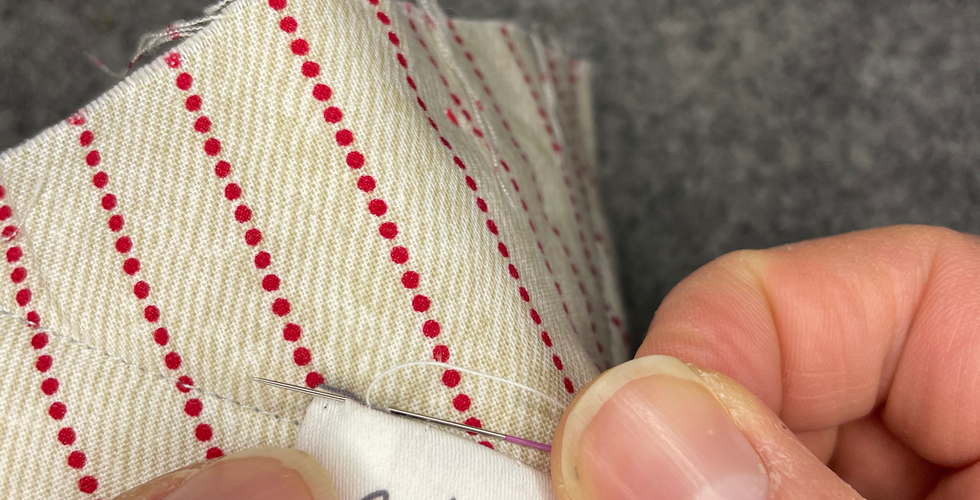
Needle (I am using a Binding needle from Lori Holt at Bee in my Bonnet)
Scissors
Optional: Thimble or Needle puller


LET'S GET STARTED:
Prep Your Label
Before sewing your label to your quilt, you will need to do a little prep work.
For my labels, I am using the EQ Printables Sewable Inkjet Fabric Sheets by Electric Quilt. You can find those at most local quilt shops or online. As part of the dye setting process, the label is to be soaked in room temperature water for 10 minutes and then laid flat to dry. Once dry, I find that mine usually have a slight wrinkle so I give my label a quick press to be sure it is flat.
Next, trim your label leaving a 1/4" allowance on each side. *Note: the bottom point of the home plate is not perfectly 90 degrees so I recommend lining up your ruler as shown below to be sure the label will fit perfectly in the corner of your quilt.


*Note: the trimming allowances for this label are based on a 2.5" binding. You may consider trimming your label less than 1/4" from the black line to accommodate a narrower binding width.
Then fold back the sides of your label, including the black line, and press.


Then fold the top side of the label and press.


You can trim off the very corner of the top folds to ensure there is no "peeking" out of the edge of your label when stitching it onto your quilt.


Add Your Label with a Slip Stitch
To begin, tie a knot at one end of your thread and thread your needle with enough thread to stitch around your entire label. I suggest using about 30-40 inches of thread which will give you plenty of wiggle room.


Place your label on your desired corner of your quilt, lining up the "point" of the home plate with the corner of your quilt. Pin the label in place.


Starting on the bottom right corner of the label (I am right handed and sew right to left. You may prefer to start in the bottom left corner if you sew left to right), put your needle through the middle of the quilt sandwich and come out the very edge of the label.


Pull the thread all the way out through the label.
Next bring your needle back down to the very same point where your first stitch came out of the quilt label and put your needle through the backing fabric only (be careful to not come out the top of your quilt). Move your needle no more than 1/4" underneath the backing fabric and bring it up through the edge of your label.


Repeat these same steps until you get close to the corner of your label.
When you're about 1/4" away from the corner of your label, do another stitch but this time closer together, about 1/8", to help secure the corner. Repeat again to make another 1/8" stitch, with your needle coming out the very corner of your label.


To secure the corner, insert your needle into the backing fabric at the corner and pull right back up the corner of the label.

Insert your needle into the backing fabric at the corner of the label again, and make a 1/8" stitch from the corner.

From here you can continue with 1/4" stitches along the rest of the top side of the label.
Repeat the same corner process on the second corner and continue your stitches down the remaining side of your label.


As you approach the final edge of your quilt and label, for your last stitch you will bring your needle out the middle of the quilt sandwich, opposite how you started on the bottom right corner, and tie a knot to tie off your thread. Trim the thread. This edge will be covered by your stitched on binding, so the last stitches do not need to be perfect.


And you're all done! Add your binding to your quilt using a 1/4" seam allowance using your preferred method.
*I prefer to stitch my binding on the front of my quilt first, and then fold the binding to the back, using a slip stitch to attach the binding to the back of the quilt.


But wait there's more!
Do you want to add a handmade look to your label? Check out this blog post to guide you through adding the Baseball Stitch to your label after completing these steps. I've also linked a YouTube tutorial below.


Don't forget to tag me @jessicasteeledesign in your Fastball Quilt photos on Instagram and use the hashtag #fastballquilt! I can't wait to see them!
Comments